Helpful TipsHome & Projects July 8, 2020

Organizing Your Home

In these times we seem to be stuck inside more often than not. This can make our home feel a bit more cluttery or unorganized. Take advantage of the time you’re home and get things organized. But, where do you start? If you break it down room by room, it will make the task feel a bit less overwhelming. And before you get started, consider the follow tips.


Kitchen

A kitchen is often the most used room in the house, which can cause it to feel to most unorganized. The countertops especially seem to be the catch all for almost everything. The first thing you can do to make a difference is to take unused or unnecessary items off the counters. Adding open shelving is a great way to store those frequently used items for easy access. And store the larger items that you don’t use as frequently in cabinets above or below.

A must-have for all kitchens organization is a lazy Susan. This brings the back of your cabinets to the front. The best items to put on a lazy Susan are the heavy, messy and clumsy ones that you seem you use often. Plus, they’re much easier to clean than a cabinet.


Living RoomOrganized Living Room - Chaos to Order - Chicago Professional ...

First, take inventory of all the items. Figure out what doesn’t belong, what needs to be disposed of, or what can be moved to make it feel less cluttery. It’s best to really take the time to consider the flow of the room and how foot traffic will interact with the furniture.

A good tip is to use items that serve as multiple types of things. Find items that have storage underneath, this will really help cut down on the disorganization.


Bathroom

Open shelving seems to work the best in bathrooms as both functional storage and for aesthetics. It allows you to store bathroom supplies, towels and toiletries in addition to providing a very welcoming feel.

Then, check under your sinks and in your medicine cabinets. Time to go through all those items and discard any old, unused or expired items. Once the amount of items are reduced, you can reorganize to make it feel much cleaner.


8 Ways To Simplify & Organize Your Master Bedroom - Organization ...Bedroom

In a bedroom you want to maximize space and minimize clutter. A couple tips to do this, especially if your closet is small, is to place a garment rack against the wall or store out of season clothes elsewhere. Additionally, use the underside of your bed as a storage area with bins or roll out shelving. If you have a nightstand, use that as a dresser or a bookshelf as a decor piece.

The way you hang your clothes can also make a big difference in reducing clutter. Hang the most used items at eye level and those not used as often and accessories higher up. This will help you not also stay organized overtime but also save you time when you’re getting ready.


Garage

Garages can get very unorganized and cluttered since it’s not often looked at. But if it’s done right, it can be a very useful storage area with room to park vehicles. The best tactic is to go vertical. This will allow you to store your items as well as those large bulky items that you don’t use everyday.

If you go room by room when reorganizing your home, it can make it a much more doable task. And don’t be afraid to really tear a room apart to put it back together. Something it has to be worse before it can get better.

Credit: Sandy Dodge – Windermere Blog

Best of CDACDA is AwesomeHelpful TipsLife on the LakeSummerThings to Do and See in North Idaho June 15, 2020

Safety On The Water

One thing you can almost be sure of is at some point you will find yourself on a boat during the summer here in North Idaho. With the numerous amount of lakes and rivers, it’s near impossible not to enjoy boat life, even if it’s only for a day. Whether you’re an avid boater, only enjoy it every now and then or are just getting into boating, it’s always a good idea to know the basics of boating safety before leaving the dock.


Image result for boating


1. Check the Weather Before You Leave

Be sure to check the weather of your route and destination, including the water conditions, before you depart. You can’t always tell a storm will roll in just by looking outside.


2. Have the Proper Gear Onboard

You never know if or when you’ll have an emergency. Being sure you have all the proper gear onboard will help avoid additional issues and will ensure you’re prepared for every type of situation. Check out a full checklist here!


3. Be Aware of Carbon Monoxide

Always maintain fresh air circulation in your boat and be sure you and others on the boat are aware of carbon monoxide poisoning symptoms. Click here to learn more about CO & CO poisoning.


4. Take a Boat Safety Course & Know the Rules

There are several different courses you can take online for boat safety that you can receive certification for them. Check out the list here.

Knowing your rules will ensure you and other boaters safety. Check out the navigation rules here.


5. Get your Boat Checked

You can receive a free boat check! The U.S. Coast Guard Auxiliary and U.S. Power Squadrons both offer that service. These checks make sure you have the proper safety equipment and that they are in the proper condition per state and federal regulations. Find out how to get your check scheduled by clicking here.


6. Use Common Sense

Many of the rules on the water are consistent with the rules on the road. Stay alert, operate at a safe speed, make sure passengers are following safety measures, avoid alcohol use when driving and stay clear of the engine are examples of just a few.

Image result for boating in north idaho


7. Follow Proper Procedures

Knowing and following proper docking & anchoring procedures are an important part of boating. Depending on the type or boat you have and the weather conditions, the procedures you need to follow could be different. Be sure you know what to do.


Credit: Discover Boating & Nationwide


Helpful TipsHome & Projects June 2, 2020

Backyard Chickens

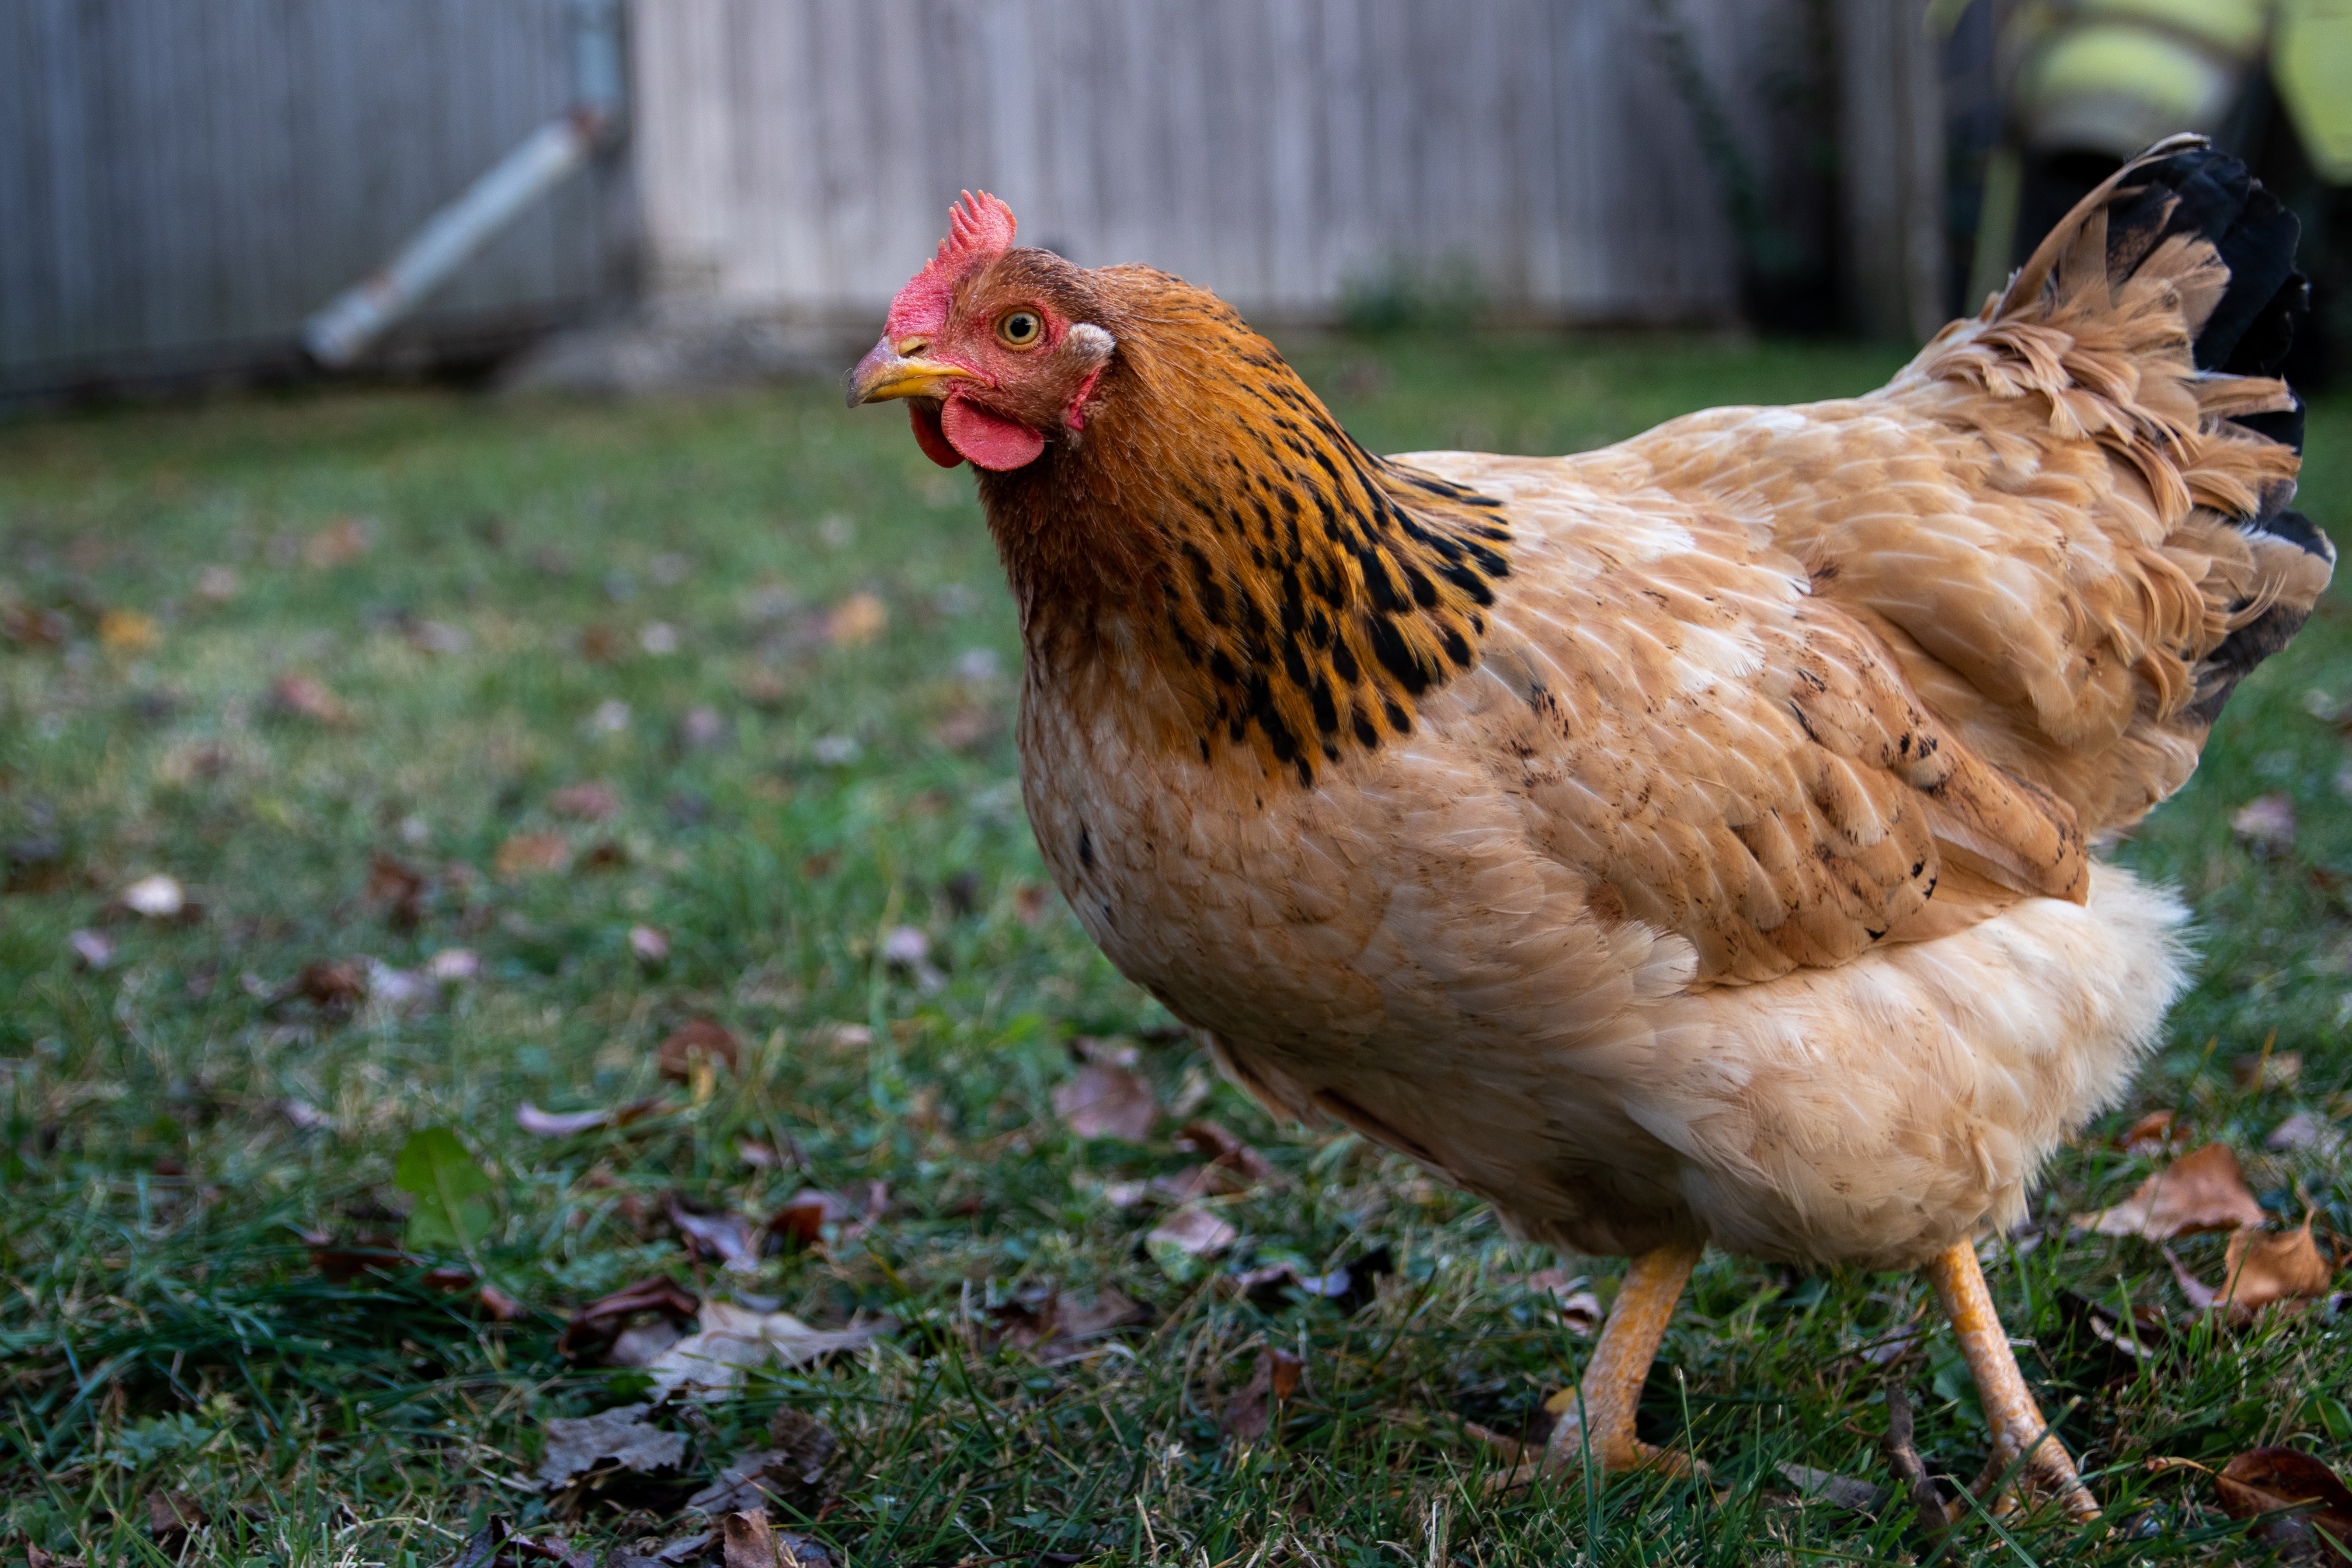
Backyard chickens have been increasingly popular as people try to have more self-sourced food. But what is really involved in raising chickens in the backyard of an urban development? Is the benefits worth any drawbacks? Where do you even get started? We know a few families who keep chickens and they have some advise and information that may be helpful if this is something you’re considering.


Where to Startbrown chicken

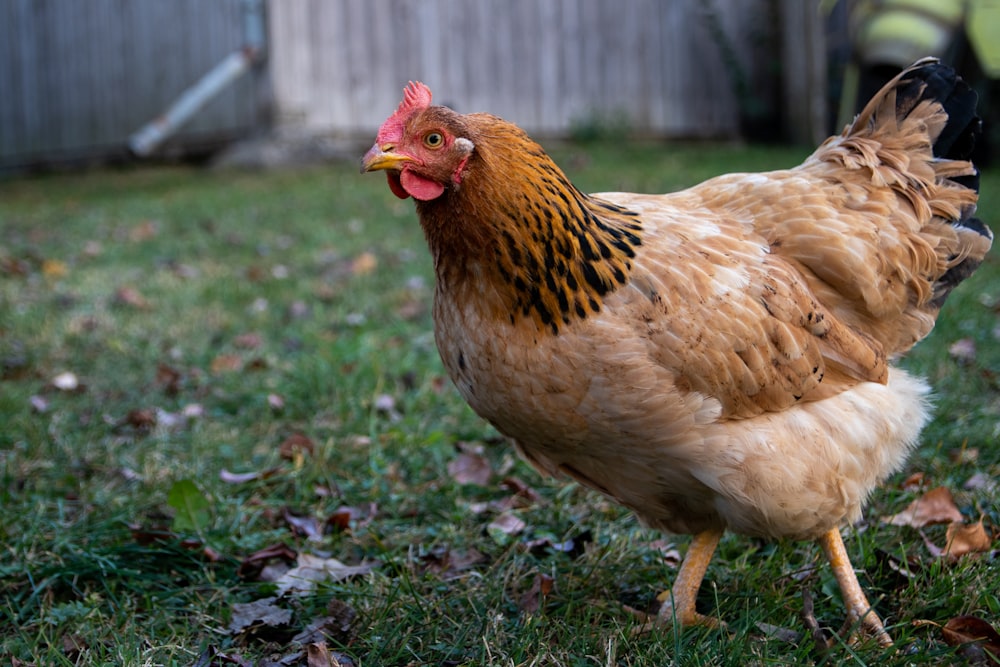
Step 1: Know the Law.

Locate your cities municipal regulations as well as your subdivision’s CC&R’s/Bylaws. Every city and neighborhood may have different rules and regulations around raising chickens. For example, many don’t allow roosters (which is fine because hens will lay eggs without them), you may need a permit, signed agreements with neighbors, or there may even be restrictions or ordinances regarding location or size of your coop.

Step 2: Decide on the Chicken Breed.

Believe it or not, there are actually many different chicken breeds that have been bred for different purposes. Depending on what you are using your chickens for, you may choose to get a certain breed or multiple different types of breeds. There are 4 different categories:

  • Egg Laying Breeds – As you could imagine but their name, this type of hen was bred to produce large amounts of eggs in a short production lifetime. This is typically the breed that many homeowners choose when picking the type of chicken to have in their backyard.
  • Meat Breeds – Once again, the name gives away the purpose of this breed. They grow very quickly, put on weight at a crazy rate and are typically slaughtered at about 9 weeks old.
  • Dual Purpose Breeds – This breed is productive in the egg laying department but also get large enough quickly to be used as meat, it’s the best of both worlds.
  • Heritage Breeds – This type of chicken is naturally breeding, they have a very slow growth rate and live long outdoor lives.

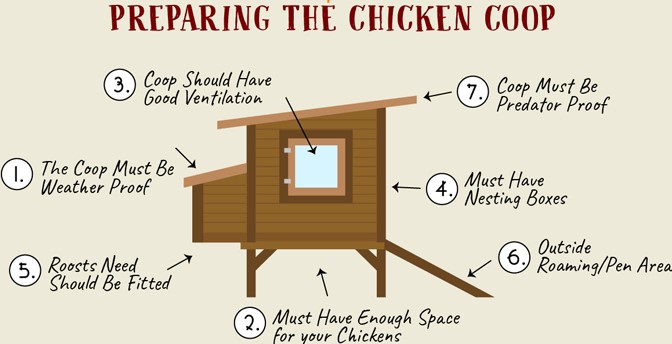
Step 3: Build Your Coop.

When it comes to building a chicken coop, there are a few things you need to be sure you have. First, you’ll want the basic shelter requirements, which means a waterproof place for the chickens to get out of the elements. Second, be sure they have enough space, since they can begin to peck at each other if they are too cramped. Third, the coop needs to have good ventilation so it’s cool in the summer and warm in the winter. Fourth, you will need nesting boxes for your hens to lay their eggs. Fifth, include roosts, so the chickens have a comfortable place to sleep. Sixth, the chickens need a space to roam outside of their coop, whether that’s in a pen or free range. Lastly, be sure you have security, predators will not hesitate coming into your backyard.

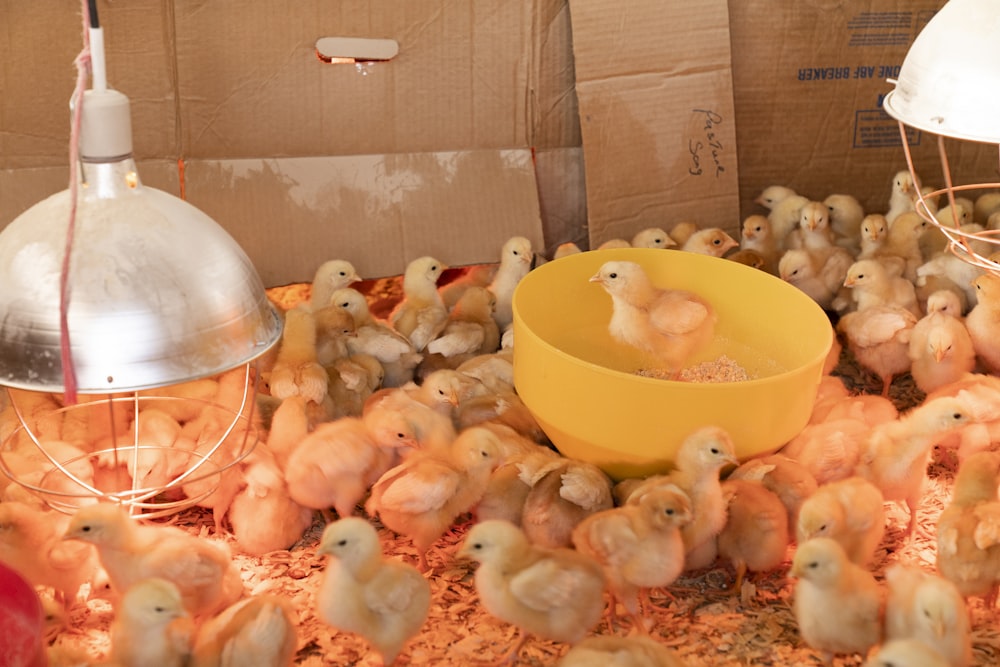
Step 4: Prep for Chicks.

Raising chicks requires a few additional supplies compared to if you get you chickens full grown. Those supplies include a brooding box, this doesn’t have to be very expensive or complicated, it just needs to be large enough and protect the chicks from any drafts. Bedding, pine shavings will do, which is also inexpensive. Be sure they have traction and don’t slip around, or they could develop a walking issue later in life. Traction can be as easy as putting some paper towels down under your bedding. Warmth, since chicks don’t get all their feathers right away, we must help them stay warm. A heat lamp for the first 6-7 weeks should do the trick. Food, chick food can be a bit complicated but here’s how it breaks down:

  • 0-8 weeks: 18-20% starter feed crumbles
  • 8-14 weeks: 16-18% starter/grower
  • 15-18 weeks: 16% finisher
  • 18 weeks upward: 16% layer feed

    white and pink rabbit plush toy on yellow plastic basin

The food comes medicated, with a coccidiostat which protects them from a coccidiosis, or un-medicated. If all your birds have been vaccinated, the un-medicated food is fine . Additionally, getting a feeder along with the food will help cut down on the mess. Water, be sure the water you feed your chicks isn’t too hot or too cold and that it’s changed out frequently. You can add an electrolyte/vitamin supplement to the water for the first few days. For additional details on the specifics of the supplies you will need, read more here.

Step 5: Get Your Chickens.

You can purchase chickens at most any stage in life – from an egg to an adult – the best option for backyard chickens is when they’re chicks, typically about 1 day old. This option allows you to pick the breeds you’d like, when you’d like them and it’ll be the cheapest.  You can get your chicks at a local farm, hatchery or farm supply store. USPS also ships chicks, if you choose to purchase your chicks online. Determining where you get them will take some research and ultimately will be up to what’s the most convenient for you. And once you’ve decided where you will purchase your birds, you’ll want to be sure to pick the right ones. Avoid birds that are lethargic, sitting by itself & reluctant to move, or once that has any nasal and/or eye discharge. Check out the link here for some good questions to ask your breeder.


Caring For Your Chickens

Once you get past the chick stage, caring for your chickens is relatively easy. Your coop is built and it has everything they need. All that’s left for you is to provide their food and water and care for any physical needs. Water is very important because if a hen doesn’t get enough water, it can affect her egg laying. If a hen goes without water for 24 hours, she could stop laying for weeks. Hens needs about a cup of water each day, so be sure to set out enough water for all the chickens. Next, you’ll need to be sure to have enough food and the type they need. Chickens will dig up a portion of their diet and eat insects, seeds, etc. But, you’ll also need to put out chicken food specifically made for their needs. To read more about the right type of food, click here.

Over time, you will develop a routine with your hens. Mornings tend to be when you let the chickens out of their coop, check on food & water and do just a general inspection of everything. In the evenings, you’ll lock them back up in the coop and collect your eggs. There will also be other chores you’ll need to preform, like cleaning out their coop and tending to their nesting boxes. That usually happens about once a week.


The Things Nobody Tells You

You will get a list from any person who current has or has had backyard chickens of things they weren’t expecting. If you’re seriously thinking about getting chickens for your own backyard, you might want to consider that some of the following will be true for you as well.

two white eggsFirst off, something you’ve probably thought about already is that chickens are dirty and smelly. Seems pretty obvious, right? But the question is, how much dirty and smelly is too much for you? Whatever you do, it will not make the smell go away. They are constantly pooping and tracking it around. Lay out more straw or pick it up more often, doesn’t matter. With the smell comes the flies, which is a whole other problem that you’ll have to deal with.

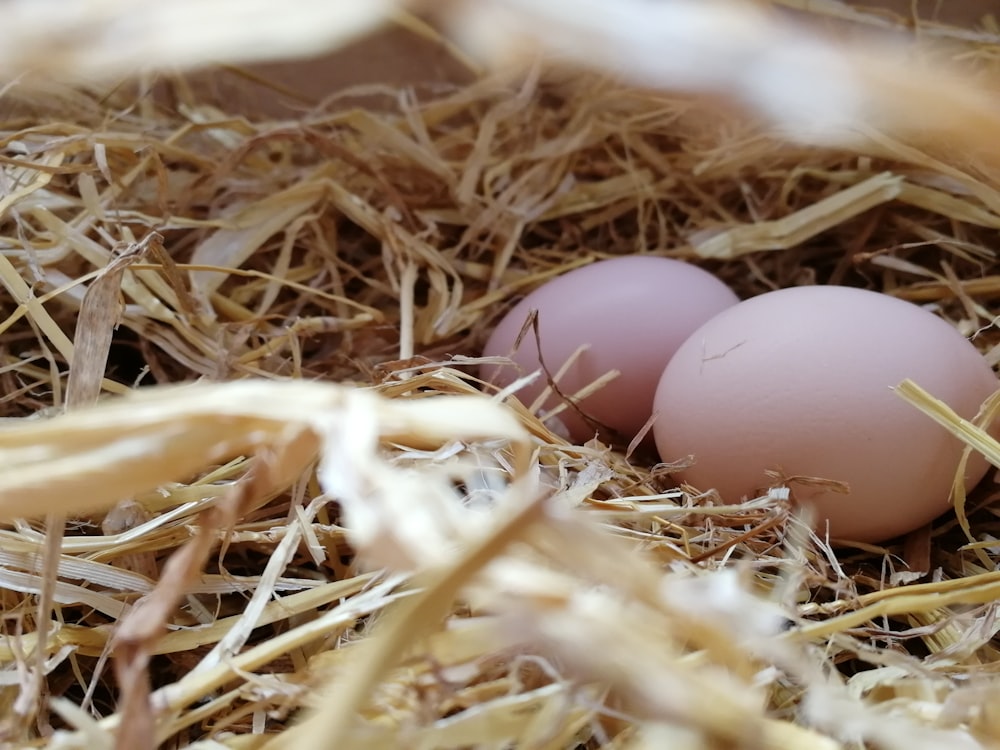
Your chickens may not lay eggs when you expect them to. There’s a chance they’ll start laying after the age they’re supposed to, even if you get the egg laying breed. Or not as frequently as you were expecting. They could even stop laying all together, which is alarming and there’s likely a reason for that. Check out a few reasons here.

You may begin to feel and treat your birds as pets or even like your kids. They even enjoy human interaction like any pet would. And that’s all totally normal and okay, until…. and dies. Which happens frequently. One of your birds or the entire flock could get sick and die. Or, a predator may get into your backyard and cause a lot a mayhem. You could also get lucky and your bird will live through it production life, but then you’ll need to make the decision of keeping that bird and spending lots of money to feed it, giving it away, or even having it for dinner.

You may expect a hen but get a rooster, that isn’t surprising. Chicken sexing is about 90% accurate, which sounds pretty high. But there’s still a pretty good possibility that you’ll get a rooster. Which isn’t ideal for most backyard flocks since roosters and typically illegal and a nuisance.

Sometimes It Doesn’t Work Out

Don’t feel bad if after trying to raise backyard chickens you determine it’s not something for you. It takes the right kind of person with the right kind of circumstances to be successful and happy. And even if it worked for you in the past, sometimes circumstances change.


Credit: ModernFarmer, TheHappyChickenCoop, GoodHousekeeping

Helpful TipsHome & ProjectsSpringSummer May 15, 2020

Spending Memorial Day At Home

Staying home this holiday weekend?  Here are some great ideas to get ready for a great summer!

Memorial Day traditionally represents the kick-off of summer. Kids are getting out of school (that’s not so much the case this year), families are making summer vacation plans, and backyard barbecues are on everyone’s minds. This is also a great time of the year to get your house in order and ready for the summer season. The following is a handful of ideas and tips to help you with this process.


Outdoor Spaces

GardeningGardening It’s not too late to start your garden! This weekend I will be planting an herb garden; I planted summer vegetables a few weeks ago.  If you’re thinking of doing the same, just make sure you use starts because many summer harvest vegetables won’t start from seed this late in the season.

Outdoor living My home has an outdoor space with great potential, including a partially covered patio perfect for entertaining. This weekend I plan to upgrade the space with small touches to make it summer party ready. This includes finding outdoor lighting options, updating the seating and cleaning up the barbecue.

BBQ- Make sure your grill is ready to go this season by making sure everything is clean and in working order before you fire it up. In the northwest that includes making sure the fuel lines are spider-web-free. Also, make sure you have propane or charcoal on hand for impromptu dinners.

Clean Windows- Now is a great time to clean your windows, inside and out. Sun shows more dirt and smudges.

Lawn care- Prepare your lawn for the months ahead. Depending on where you live this means different things. Check your sprinkler system to make sure it wasn’t damaged over the winter; upgrade your lawn care to ensure fuller greens, check for and remove moss to prevent dead patches and start your weeding regimen.

Pool prep- If you have an outdoor pool, get it ready for a summer season of fun in the sun. Same goes for hot-tubs. Make sure your equipment has been serviced, chemicals are available and your pool is clean and ready to use. OR, head to the local hardware store and buy your kiddie pool now before they run out, as I learned one hot July!

De-winterize- I once was doused head to toe when we were turning the water back on to our exterior pipes because the pipe had split in the winter- so make sure all your pipes survived the cold, check your winterized projects and prepare your house for summer.  This is also a good time to look around the exterior, checking roof, gutters and siding.

Summarize- Check or replace AC filters, window screens, and household fans to make sure these are all functioning and will help provide maximum circulation in your house. Consider installing an attic fan or vent to help pull heat out of your home all winter long. Pack away excess cold weather items such as heavy blankets, jackets and other items so they aren’t in your way. Same goes for any sundry items you only use during fall and winter.


Inside Spaces

Lighten the Space- Though I likely won’t spend much time inside once the mercury rises, I want to keep the house as light and cool as possible. I have found that replacing the curtains with a lighter shade lets the light in, but also keeps the rooms from overheating from sun exposure. Summer always makes me want to lighten up with the accessories- lighter colors, more whites, bright accents and less clutter.

Rearrange- Freshen up spaces by rearranging some of your wall art. If you don’t have enough wall pieces to rearrange regularly it may be time to add to your collection. You can find inexpensive original art online at stores such as Etsy or in person at local galleries. You can always play with other items like framed images from books, vintage posters or record albums. Here are some terrific ideas for using what you have to add interest to a room.

SpringCleanupAir it out- Open all the windows, shake out the rugs and update home fragrances to fit summer moods (citrus, freesia, clean linen, coconut, melon, fruits and tropical, etc.). You can create your own diffuser with essential oils to distribute fragrance. This may be more symbolic than practical but it always makes me feel ready for summer.

Paint- If you have a room you really want to refresh, a three-day weekend is a good time to take on a project of scale, so you have plenty of time to prep, paint, dry, and clean up. Painting is one of the least expensive ways to really transform how a room feels. Need help picking colors and paint type? Here is some good advice.

Garage or Basement- Tackle a big space that makes a big difference. Our garages and basements often become year-long dumping grounds for seasonal decorations and clothing, items that don’t fit in cabinets, memorabilia and maintenance tools. Go through your items and sort by keep, throw out and donate/sell and then group your keeps by function. Make sure your tools are accessible for easy gardening and entertaining by making sure your tools are accounted for, ready to go, and easy to reach. Here is a useful video on garage organization.

Yard/Garage Sale- If you have overflow at your house, plan a yard/garage sale to get rid of items you no longer need or want. Just make sure to pack everything up and donate it at the end of the sale otherwise you are just letting the clutter back in!

Plan a party- Once your space is all cleaned up and redecorated you will want to show it off! Plan a summer BBQ, dinner party, pool party, picnic or any other gathering.


What are your planning for Memorial Day weekend?

Source: Tara Sharp – Windermere Blog

Helpful TipsSpringThings to Do and See in North Idaho May 4, 2020

Morel Season in North Idaho

Beautiful North Idaho has so much to offer! One great thing is all the edible mushrooms you can find. And spring is a great time to find them. But, you need to know what you’re doing and what you’re looking for as there are more poisonous mushrooms than edible ones. Check out some mushroom identification and tips below.


The most common and popular mushroom in our area is the morel. You have likely heard about morels, and may even have had the great pleasure of tasting one, but you want to be sure you know what you’re looking for if you choose to more hunt.

Where To Find Them

Don’t expect an expect morel hunter to share their secret more picking spots, for many reasons. The majority of morels grow in the wild, so even if they know you well, they will likely keep their spot a mystery. They wouldn’t want to visit their spot and find it picked clean.

But, as a new morel hunter, there are some tips on places to look. For whatever reason, they tend to grow in areas that were burned the previous year. Searching in a recent burn is a great way to get your feet wet and figure out exactly what you’re looking for.

Additionally, morels tend to grow in cottonwood forests, under elms and by rivers. Once you find one, you will likely find more.Unfortunately, the growth of morels are a bit perplexing and difficult to find which adds to the reward when you do find them.


How To Identify

You could be looking in all the right places, but if you don’t know what you’re looking for then you won’t get very far. Below are a few tips to positively identify a morel:

  • Honeycomb-like cap with brown pits and ridges
  • The cap is fully attached to the stem and doesn’t pop off
  • If you slice the mushroom in half, it will be hollow inside


False Morels

The are a couple morel lookalikes in the area that you will want to keep a lookout for when morel hunting as these mushrooms are poisonous:

Gyromitra esculenta - Wikipedia

Brain Mushroom

  • Hooded False Morel | Project Noah

    Hooded False Morel

    Brain Mushroom – The cap of this mushroom is more or less convoluted, round & brain like which come in various shades or brown to reddish brown. The difference between this mushroom and a morel is that the Brain Mushroom doesn’t have a honeycomb like cap. These mushrooms grow at the same time and in the same habitat as a true morel.

  • Hooded False Morel – The cap is brown and saddle shaped, it starts out smooth but becomes more convoluted/wrinkled as it matures. So, this mushroom also doesn’t have a honeycomb like cap either. It also grows at the same time and in the same habitat as a true morel.


Both of these morels grow in north Idaho and are poisonous. They can cause adverse physically reactions within 1-24 hours of ingestion and I would advise avoiding at all costs.


When To Look

The basic answer is spring time, so late April-early May. But that all depends on the year, elevation and temperature. Morels like warm soil, so you will likely find them in the lower elevations earlier in the year and higher elevations later on. Morel season could last up to 2 months. The best time to look is on a sunny day, after a rainstorm.


How To Pick, Process, Cook And Preserve

Like it was stated earlier, morels grow mostly in the wild. So you want to be sure to pick them correctly to allow for them to grow next year. Be sure to pinch or cut them at the base. Do not pull them up or remove the root ball. Additionally, carry them out with a woven basket or mesh bag. This allows for them to release and spread spores. Do not use a plastic bag which not only stops the spread of spores but it also makes your mushrooms get slimy quick.

How to Clean and Cook Morel Mushrooms | Serious Eats
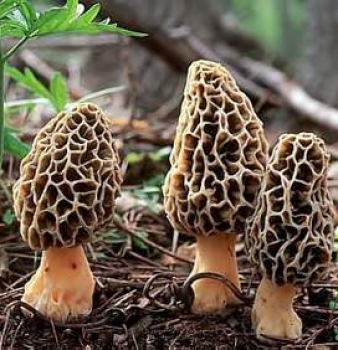
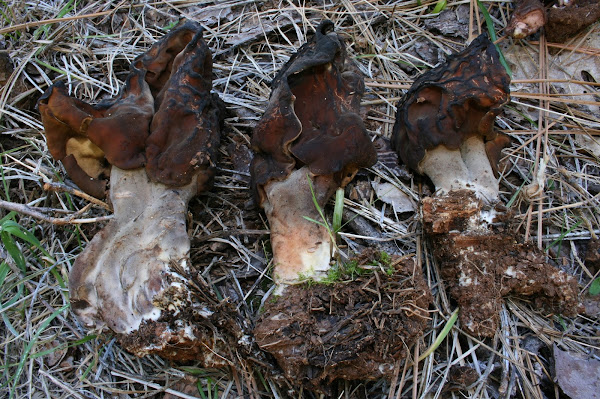
Once you get your mushrooms home you want to be sure to immediately get them processed. First, get them washed. There are a couple schools of thought regarding washing a mushroom. You could just brush off any dirt and inspect for worms/pests. Not using water because that could cause the mushroom to soak it up and dilute the flavor. Or, you could soak them in salt water overnight to get rid of any worms/pests.

To prepare the mushrooms, they do need to be cooked. They taste the best when harvested at just the right time and cooked shortly after they are picked. These mushrooms are choice, highly priced and sought after so be sure to take your time and research the best way to prepare the mushroom to enhance the flavor. Click here for some resources I’ve found.

If you don’t plan to eat them right away, it’s best to store them in a brown paper bag on your counter for no more than a few days. Or, if you’d like to preserve them for longer, you could always dry them. You could use a dehydrator to do this or just thread them on a string and let it dry in an area that is hot, dry and with a slight breeze.


Other Mushrooms To Lookout For

There are many edible mushrooms in North Idaho, some show in spring and some grow in fall. It’s best to do your research to determine what’s edible and how to harvest and cook these mushrooms. Click here for a quick list of some edible mushrooms in North Idaho, and how to identify them.

Here are some gorgeous pictures of some wild mushrooms taken right here in our national forests:


Credit: TwinEagles, IdahoStatesman, FunFal Forager, Riverman


Helpful TipsHome & ProjectsSpring April 21, 2020

Spring Gardening

Spring has sprung! It seems like it may be warm enough to start getting things in the ground, but we also live in North Idaho and could get random snow without warning. So, is it really a good time to start planting? Check out some tips below for getting fruits and veggies planted. It’s never too early to start planning.


When to Plant

On average, the last frost in the area is anywhere from May 8th-15th so planting before then is a bit dangerous. There are warmer years when the frost ends much sooner than that, but overall is a good idea to wait.

Wait to buy! All those big box stores are starting to bring out all their plants and flowers and they look great. But, the likelihood they will survive this early is up in the air without frost prevention measures. Resisting the urge to buy until it’s time to plant will save you money and time.


Seeding Indoors

Now is a great time to get some of your favorites seeded indoors. Purchasing seed packets are cheaper than plant starts and you get more options. You only need a few basic items and a warm, sunny window. Read all about how to start seeds indoors here.


Prepare Your Garden

Take a look at the winter damage in your garden. Make sure your perennial are still holding strong. Next, rake out any leaves or debris that’s left over. And pull out those weeds, the soil is wet so they will come out easier this time of year. If you choose to use a chemical to kill the weeds, be sure to read up on it so it doesn’t kill everything. Additionally, it’s not recommended to use vinegar as a weed killer. I will wilt the leaves and make them look dead, but their roots will still be alive. It will also damage the PH of your soil and kill the good micro-organisms living there.

person holding carrots

You can also start planning your 2020 garden. Figure out what and where you will plant things. A good idea is to not plant the same crops in the same spot each year, but rather to rotate them to prevent soil depletion and disease. Keeping a journal of your garden each year will help with that planning. It becomes a valuable tool year after year so you can know which plants thrive where, track weather patterns and planting times.

Don’t work with wet soil. It will compact and create rock hard mud balls which are impossible to work with. Only after the soil dries, should you gently turn the top layer of soil. No need for a deep rototilling, this will bring weed seeds to the surface. And before adding anything to your soil, it’s best to test it first so you know what it needs. You can find soil testing kits here.


Planting Calendar

You can plant cool season crops directly outdoors in late April or early spring. Those include peas, spinach, kale, lettuce, and carrots. But, of course, it all depends on the weather. If you plan to sow seeds directly into your garden, you will find that most of them do well when planted in early May. There are options if you want to transplant seedlings or start seeds indoors. Here are two great resources to help with timing of your planting:


Credit: Garden.org, Almanac.com, Coeur d’Alene Coop


Helpful TipsThings to Do and See in North Idaho April 3, 2020

Getting Through Quarantine Like A Champ

Whether you are choose to self-quarantine or are ordered to do so, staying at home can get boring! We all get stir crazy after a while. We can only clean the house so many times and watch Netflix for so long. And if you have kids, that can just be torture! But, there’s plenty you can do, even at home. Check out some fun, wacky and useful ideas below to survive the rest of the quarantine!

self quarantine - Imgflip


Fun, Entertaining & Wacky Ideas

1. Tour museums, zoos, aquariums & theme parks virtually. Check out a list of 30 here!

2. Put on a T.V. show like a soap opera, mute it, and create your own dialogue.

3. Watch all the long movies you’ve avoided, especially the ones who won awards.

4. That goes for books too.

5. Have a FaceTime, Skype or Zoom meeting with your friends and family. Create a weekly or biweekly happy hour to stay connected with everybody.

6. Subscribe to a free trial of a streaming service and binge watch everything you can before the subscription ends.

7. Watch all those movies that skipped the theater.

8. Learn how to play and then play all those complicated board games.

9. Color in coloring books. Kids are optional.

10. Write a book, short story or play with all the main characters being your family members.


Productive Ideasperson using MacBook Pro

1. Organize! That goes for your closets, junk drawers, and tupperware cabinet. Get rid of everything you no longer need.

2. Learn a new language.

3. Get everything done on your honey-do list.

4. Work on your financial planning, create or update your budget and find out ways to save money.

5. File your taxes.

6. Update/write your will and make sure all your affairs are in order. I know that sounds morbid, but that’s something everybody avoids doing.

7. Learn something new that’s you’ve never had time for like calligraphy, knitting, crocheting, or how to make origami.

8. Train your dog.

9. Workout

10. Learn about the stock market.


Ideas for Kids

pink plastic toy on white table1. Tour museums, zoos, aquariums & theme parks virtually. Check out a list of 30 here! Yeah, it’s in this category too!

2. Make a fort. You could use cardboard or blankets and pillows.

3. Set up a a scavenger hunt.

4. Bake together and then eat it.

5. Download and fill out these printables.

6. Make play dough, check out the recipe here.

7. Do crafts like pasta jewelry or making your own board game. Click here for some crafting ideas that are quick & easy.

8. Set up an obstacle course.

9. Have a dance party.

10. Watch all the best Disney movies.


Relaxing Ideas

woman doing yoga meditation on brown parquet flooring

1. Learn how to meditate.

2. Do yoga.

3. Have an at home spa.

4. Take a bath…. add a glass of wine or two.

5. Take lots of naps.

6. Go for a walk.

7. Listen to or play music.

8. Start a journal.

9. Watch/read less news.

10. Breath… in through your nose and out through your mouth. We’ll all get through this together.


Credit: USAToday, Money, BuzzFeed, Parade

Best of CDA March 25, 2020

Tindall Top 3 – Micro Climates

You’ve probably heard of micro climates before but don’t think twice about it. But, when we’re talking real estate, it may be something you should consider. Find out below what exactly a micro climate is and why they are important when making your real estate decisions.


What Is A Micro Climate?

A micro climate, by definition, is a small-scale area that experiences a different climate than the surrounding area. The micro climate will have a small variation of temperature, snowfall, rainfall, wind or humidity. Although it’s only a small variation, it is noticeably different. They will typically occur due to features in the landscape such as mountains, elevation, and bodies of water.

One example of a micro climate is a forest. Under the canopy of trees it is typically colder, wetter and has different soil compared to the area surrounding the forest. If it wasn’t for this micro climate, many organisms wouldn’t be able to survive. A second example is a large urban area. There are many factors that affect the micro climate in a city, it is typically warmer due to the building materials that absorb heat and the tall buildings alter the wind flow.

Micro climates are essential to support unique ecosystems all over the world. You have likely noticed a micro climate, even if you didn’t know what it was, as you were walking through a mountain meadow, valley, or marsh. They all work together like patches on a quilt to create the climate on the continent and throughout the entire globe.


Do We Have Them?

We do, in fact, have micro climates all over North Idaho. Because we have a higher elevation, are surrounded by mountain & bodies of water and also have valleys, we have many micro climates in a small area. Back in 2005, 27 different micro climates were identified. The biggest and most noticeable micro climate is a snow belt. This is an area where that’s consistently getting more snow than the surrounding area. We have many snow belts in Northern Idaho. Some are naturally occurring due to the higher elevation and proximity to mountain, whereas others are due to higher population in one area which cause the average temperate to rise.


Why It Matters In Real Estate?

Wouldn’t you want to know if you were purchasing a property that will have consistently longer and colder winters. Or one that will have a higher average temperature? This is important and necessary information to have when deciding on a home purchase or the area you’d like to live. That’s where we come in! We know the area and many of the micro climates, we can steer you in the direction you need to live based on the climate you’d like to live in.


Credit: Science.jrank, Cd’A Press

Helpful TipsHome & ProjectsSpring March 16, 2020

Spring Home Maintenance

If you’re like us, on the first day of spring you’re still waiting for the snow to melt so you can get on with enjoying spring properly. We’ve provided for you a quick home maintenance checklist of things to look over after a long winter.


Gutters

roof gutter home house water investment

Your rain gutters are designed to direct water away from your house. A yearly inspection for damage and improper drainage will help you keep your home from dreaded water damage. Image by Felix Ulich

Fall loves to dump leaves all over your roof and winter likes to cement them in your gutters. In early spring the freezing and thawing can cause the watery leaf dam to expand and crack your gutters and down spouts. Keep this frost heaving in check by cleaning out leaves as soon as you can. If you didn’t catch it in time, the spring is a great time to inspect for damage and get it replaced, if needed.  Remember, water that isn’t directed away from the house can permeate into your foundation causing loads of problems down the road, that is why it’s important for gutters to work properly.


Chimney

chimney roof break broken diy investment inspection

Lots of snow and strong winds can compromise your chimney and other brick work that your home might have. When you can safely get on the roof, inspect for water intrusion or any misplaced and ill fitting bricks. Image by AxxLC

Chimneys stick out like a sore thumb on the top of your house. That means they’re especially vulnerable to the wind and inclement weather of North Idaho winters. There are some chimney features that really need to be inspected after a winter. Check for obvious problems like bricks that look out of place or… if it’s fallen down. That’s a good indicator of a problem. Check the flashing at the base of your chimney. That’s the thin sheet of metal that keeps the water from puddling and directs it down the roof. Furthermore, a periodic cleaning of the inside bits will make it firstly, more efficient. And secondly, safer.


Siding

After a damp fall and winter your siding will most likely accumulate mold, mildew and dirt. You can easily fix this with a pressure washer. If you don’t own one, they cost maybe $30 to rent for a day. When you hose your house down, two magical things will happen: you will experience the oddly satisfying pleasure of pressure washing and your house will look brand new. Seriously.

Some of the worst areas are under eaves and near downspouts. Any stains and mold in these places definitely indicate that there is a problem with how your gutters are handling roof water.


Foundation

Remember when we said that water can permeate into your foundation and cause problems? Ground water is no joke and can completely compromise your home’s structural integrity. Concrete is porous and readily holds water and that water will cause the concrete to break down over time. If you live in areas that get cold, you also run the risk of frost heaving. Both of these scenarios will cause your foundation to crack, or your home to be unsettled and shift.

The spring is your first opportunity to check your foundation for any problem areas. We recommend checking near downspouts and areas that tend to be waterlogged.


Roof

roof house moss mold investment diy clean

Unless your roof moss problem is a wild animal, a simple gentle scrub with soap and water should fix your fuzzy roof. There are chemicals available at home improvement stores to make this process easier. Image by RitaE

Shingles, slate and other roofing materials are not indestructible. While you’re already on the roof checking out the smokestack and gutters, give the roof a good look over. Look for out-of-place shingles, sagging spots or raised shingles. Water will get in any way it can. Your vigilance will keep your roof at the apex of its abilities.

Additionally, check for moss or other organic material. Moss holds water like a pro and the last thing you want is water perched on your roof waiting to find a way in.


Lawn

grass lawn green landscape landscaping home yard

Feed your lawn with a fertilizer of your choosing to give your turf a head start this summer. Image by Hans Braxmeier

We have tons of leafy beautiful deciduous trees in our yards. Every spring, without fail, we find clumps of leaves we missed before the snow fell. When the snow is gone, go clean them up. Debris that is left on turf for too long will suffocate and deprive grass of valuable sunlight.  This is also a perfect opportunity to rake and fertilize your lawn and give it the best fighting chance for yard of the month.


Planting/Gardening

Spring is a great time to get started on getting the flower beds ready for the months of upcoming growth. After winter, your soil will be dried and packed, best to revitalize it with some compost or manure. This will increase the health of the soil and in turn, your plants. Trim up your existing shrubs and plants to allow for new growth. It is best to wait until mid-April or May to do this. If it’s still getting too cold for plants to survive overnight, start seeding indoors. Vegetables and annuals can be started indoors 6-8 weeks before planting them. Once soil temperatures have reached the optimal temperature for your plants, get them in your prepared soil outside. Some recommendations for good spring flowers/scrubs include the following:

Put manure & fertilizer in your soil to keep your plants healthy in summer months

Pansies

Snapdragons

Vegetables like lettuce, peas and arugula

Redbuds

Transplanting tomato plants from indoor pots to outside

Lilacs

Tulips


Pests

Many pests and critters breed in spring. You can help keep them in check by cleaning the places they would typically habituate. That includes basements, window sills, under cabinets, behind appliances and ceiling corners, just to start. Prevent unchecked population growth by getting rid of the dust and debris that would typically provide shelter. Keeping your counters and trash bins clean will offer less food to the critters. If you’re more concerned with poisonous spiders or the bugs are taking over, call the pest exterminators!


Energy Rating

This winter, we found tons of drafts and cold places throughout our house. This is not good. Remember, air is small and goes wherever it wants. Including your bathroom windows and under your front doors. You get the idea, and just think of all the dollars you are literally letting slip through the cracks. My dad always used to yell “Close the door! We’re not heating the neighborhood!” Turns out that if you don’t repair the seals and weather strips, you are- in fact, heating the neighborhood.

Also. Bugs are small, they too come through the cracks. See above.


Climate Control

Your furnace was crucial during the winter and fall. Your AC will probably be a close friend during the summer. Take care of your friend before its in the triple digits. There are some really easy preventative maintenance tasks that you can do, or if you don’t feel confident- call an HVAC technician to service and inspect it.

Some easy things you can do: clean and/or replace your air filters, check hose connections for leaks, dust/blow off/ vacuum dirt from fans & electronics and check drip pans.

Click here for a Printable Checklist!

Helpful TipsHome & ProjectsListings & Selling your Home February 27, 2020

How To Stage Your Home To Sell

Should I stage my home? This may be one of the most frequently asked questions when a person is putting their house on the market. This question is often followed by, How? There are many things to consider and we’re here to help! Check out some tips below to get your home staged to sell.


1. Clean and RepairImage result for cleaning a home

Starting with the most obvious first, you want to make sure your home is sparkly clean with nothing damaged. Put your home’s best foot forward with a good cleaning. If your home is large or you don’t have enough time, you could always hire a pro. Also, be sure the outside of the home is cleaned in both the back and front yards. When a home is clean, it suggests to the potential buyer that the previous tenants took care of the home and property. Alongside cleaning, you should also patch and repair anything that could be a sign of neglect. Use a melamine foam eraser pad to remove any scuffs from the walls. If there are any holes in the walls, be sure to spackle, caulk and paint that area. Additionally, apply paint to any areas where it seems to have chipped. And once again, this goes for the yard too. The overall goal of this step is to make the home look well taken care of.


Image result for depersonalize your home before and after

2. De-Clutter and De-Personalize

When it comes to clutter, the less you have, the larger your space looks… and space sells! You may need to find a spot to temporarily store your belongings. Do not store them in your garage or closets because often times those get looked in. Alongside de-cluttering is to de-personalize. Remove pictures, personal knickknacks and anything that could identify the space as yours. It may be difficult to remove all the things that make your home feel like you, but it’ll be worth it.


Image result for curb appeal to sell3. Work On Curb Appeal

First impressions are everything. Often times potential home buyers will drive by the property first to make sure it’s worth their time. Make sure it’ll lure them in and make them feel like they could be walking into their home. Blooming flowers are always a nice way to add a bit of color and flare to the front of your home. Be sure everything is clean: siding, sidewalks, windows, and porch. Keep your lawn watered, mowed and overall put together. Your porch should have a clean doormat and neat porch furniture if there’s room. Be sure your number is easily readable and even keep your lights on during the evening in case there are drive by’s at night.


Image result for light when home is staged

4. Brighten Things Up

Use the natural light to your advantage. Pull back curtains or open blinds, this will make the rooms feel bigger. Turn on all the lights, even during the day. This will help make your home look more inviting and save perspective buyers from fumbling around trying to find the switch. Also be sure your light fixtures are clean and appealing, even dusting your light bulb if needed. There are also different color temperatures on light bulbs, you could play with your options to find the one that works the best.


5. Rearrange FurnitureImage result for stagged furniture

First, remove any damaged or large pieces of furniture or anything that doesn’t match the rest of your decor. With what you have left, decide if there’s still too many pieces or if you need more. You can always rent furniture if the home is too empty. Once your furniture is picked, you want to arrange it in a way that allows for plenty of open and walkable space. Additionally, there is a design technique called “floating” which positions your couches, chairs, and tables away from your walls. Add an area rug to make it feel more cozy, even if the room is carpeted.


Image result for neutral wall colors

6. Be Neutral

Bright colored walls can be a major turn off for buyers. Although it expresses individuality, it signifies the home’s past, not future. Not to mention, bold colors distract from a rooms assets and can be all somebody sees. When picking the new paint for the wall, you do not have to go straight white. There are plenty of sophisticated neutral colors to choose from and they will help make everything look cleaner and put together. Additionally, when decorating the master bedroom specifically, remain neutral. You want to appeal to all types of people, including single or married.


7. Use Every SpaceImage result for decorate awkward space in home

If you have a room that is used as storage or junk dumping area, clean it up. Each room should have a clearly defined purpose. Identify what a buyer could see, maybe it’s an office, a spare bedroom, or a kids room and decorate accordingly. This goes for any awkward areas too. Whether that’s a small nook or space under the stairs, decorate it in a way that can show off the potential.  You could set up a small workstation, put up a bulletin board or build some shelves. Even if this means you need to rent or borrow additional furniture to make this happen.


Staging a home requires much time, effort and often times, money. It may not seem like it would be worth it. But let us assure you, it is! According the the National Association of Realtors, in March of 2019, 83% of buyers said that a staged home made it easier for them to visualize the property as a future home. 1/4 of the buyer’s agents said that staging a home increased the dollar value offered between 1%-5% compared to homes that weren’t staged. Often times, staging a home will provide you with the result you’re looking for.


Credit: Moving.com, Trulia, FoxNews, NAR